When evaluating new dental technology for our office, I’ll look at several factors to decide if it’s something I will invest in. Will this technology help me do things I do now better or faster?
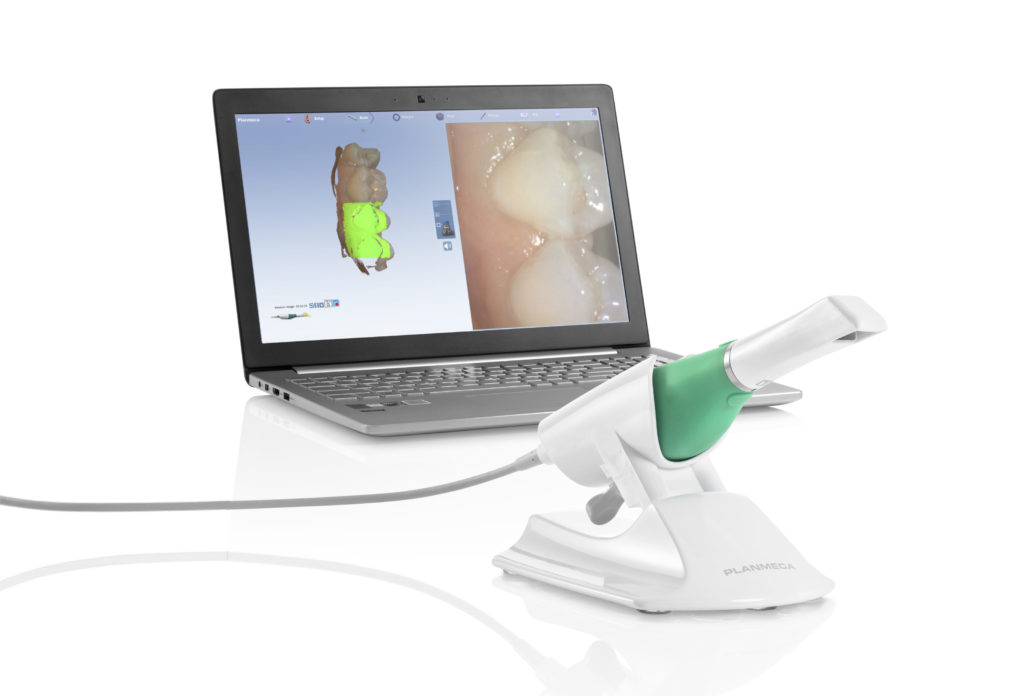
Fig. 1 – Planmeca Emerald scanner and Planmeca PlanCAD Easy version 5.9
Will this new dental technology allow me to do any additional procedures? And how will technology improve the patient experience? We incorporated two significant advances to our office recently that help in all three regards: the Planmeca Emerald scanner and Planmeca PlanCAD Easy version 5.9 (Planmeca). The Planmeca Emerald is the next-generation intraoral scanner that features a much faster scan time, native color through the use of a 3 laser acquisition and is a very light, ergonomic device (Fig. 1).
Improved Scan Speed
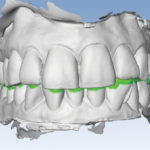
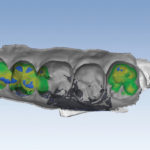
First of all, the improved scan speed allows us to scan routine restorative cases much more easily, which helps us complete cases in a more efficient manner. Also because of the fast scan speed, we find scanning full arches extremely practical, so we are now using the Planmeca Emerald to scan for things such as night guards rather than taking a physical impression, which is a nice benefit for our patients (Figs. 2, 3).
-
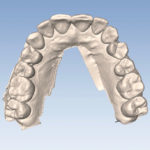
- Fig. 2 – Full-arch dental models.
-
- Fig. 3 – Full-arch dental models.
Scanner Software
Crucial to any scanner is, of course, software. Version 5.9 has many useful features, two of which we have been finding extremely helpful. First, the buccal bite is revamped for this version, allowing the user to scan two bite registrations to more accurately align the models. This, combined with the ability to refine the bite automatically, makes accurate articulation of full-arch models simple and predictable (Figs. 4, 5).
-
- Fig. 4 – Bite refinement.
-
- Fig. 5 – Properly aligned models.
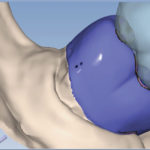
A second addition to version 5.9 that we are finding very useful is the ability to see clearance between prep and opposing. One of the things I see users struggle with is design when they don’t have proper reduction.
Restorative Clearance
-
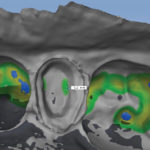
- Fig. 6 – Dental clearance indicator.
-
- Fig. 7 – Initial dental presentation.
When the clearance is tight, design becomes a bigger challenge because you need to balance material thickness and proper occlusion, which can be time consuming. This feature makes it very easy to see if there are clearance issues, allowing the user to make a prep modification prior to proceeding to the restoration (Fig. 6). Routine restorative is what the vast majority of dentists use primarily in office CAD/CAM systems. The combination of the Planmeca Emerald scanner and the updates in version 5.9 have made our bread-and-butter cases easier, faster, and more predictable. Here is a recent case completed in our office.
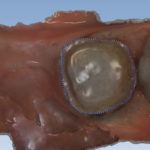
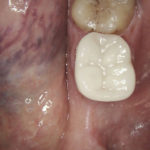
Initial Dental Prep
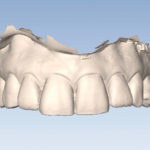
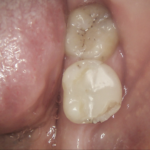
A patient presents with a chief complaint of a fractured tooth on the lower left. Exam reveals a cusp fracture of tooth #18 with a large existing resin filling. Treatment of choice is to crown the tooth (Fig. 7).
-
- Fig. 8 – Initial dental prep.
After local anesthesia (Septocaine, Septodont), a rubber dam is placed. I find the use of a rubber dam for the initial preparation very helpful, especially on lower molars, allowing me to more easily and quickly complete the bulk of the prep (Fig. 8). Once the majority of the prep is completed, the dam is removed and first size 0 retraction cord is placed (Ultradent). Preparation is refined and a second size 2 retraction cord is placed. Cord is left in place for at least five minutes to allow for adequate tissue retraction.
Planmeca Emerald Scanner
-
- Fig. 9 – Planmeca Emerald scan and prep.
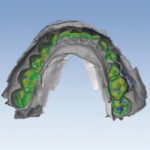
Scan the opposing arch while the cord is in place to help expedite the workflow. After five minutes, remove the size 2 cord and scan the prep side arch with the Planmeca Emerald scanner (Fig. 9). We will leave the size 0 cord in place until the crown is cemented. This helps keep fluid from seeping from the sulcus during cementation as well as preventing any cement from being pushed deep subgingival.
Bite and Clearance
-
- Fig. 10 – Heat map of a bite.
-
- Fig. 11 – Plan with bite in place.
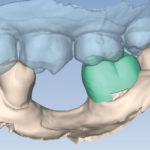
Next, scan the buccal bite. In version 5.9, you begin by scanning the upper arch until the upper model pops onto the bite. Normally, for the upper, you only need to scan the upper molar. We proceed to the lower scanning units until the lower arch pops, which requires scanning several teeth. As always, we will confirm the models articulated correctly by opening the bite window and examining the articulation. We now have a heat map bite representation that allows the user to easily see if the articulation is accurate (Fig. 10). If it appears the bite is over closed, refinement of the bite can be accomplished by going to the buccal bite scan and clicking the bite refinement button, which will fine-tune the articulation of the models.
It’s a good idea also to check the clearance at this point. If the software detects close clearance, you will see a colored indicator in the area where the software is detecting a potential issue. Moving the cursor around inside the prep will give a measurement of the clearance. This can be very helpful. If there is a tight spot on the prep, the user will see exactly where the concern is. As a result, the user may go back to adjust the prep if necessary. The model is oriented and margins are marked in the usual manner. The color model produced by the Planmeca Emerald is helpful in identifying the margins. Utilizing the Plan Tab, the proposal is resized, rotated and placed on the model (Fig. 11). This helps autogenesis provide a more accurate initial restoration design.
Design
-
- Fig. 12 – Initial dental proposal.
-

- Fig. 13 – Completed design.
My goal is to minimize the amount of time spent on design. Basic idea: The less you have to modify the library tooth, the better. If the plan step is done well normally, we find you will not need to use the incremental change tools at all and can make any needed modification with the freeform change tools (Fig. 12).
When I design a case, I will first use rubber tooth to fill out any contours on the facial and lingual, adjust the bite and marginal ridges and broaden the proximal contacts as needed. Last step in design is to check the proximal contacts and adjust as needed using the smoother or dropper tool. Minimizing the tool set I use helps me to complete a design quickly and efficiently (Fig. 13).
Milling the Restoration
The design is sent to the Planmeca PlanMill 40 (Planmeca), and an IPS e.max MT block shade A2 (Ivoclar) is milled. The restoration is tried in after milling and found to need no adjustments to the occlusion or contact. I like to try the restoration prior to crystallization for two reasons. First of all, it’s easier to adjust the material if needed in the purple stage, and second, there will be no need to republish the restoration if the final contacts are perfected prior to crystallization.
Stain is placed on the buccal and occlusal surfaces and a spray glaze is applied (InSync Jensen Dental). The restoration is crystalized on the speed crystal cycle using a Programat CS oven (Ivoclar). Once the restoration is cool, the internal aspects of the ceramic are etched with 5 percent hydrofluoric acid for 20 seconds, and monobond (Ivoclar) is applied for one minute prior to air drying.
Isolate the tooth and clean oil and debris from the prep using Clean and Boost (Apex Dental Materials). Rinse the tooth and dry it prior to the application of all three components of Surpass dental adhesive (Apex Dental Materials) per manufacturer’s directions. The restoration is loaded with Variolink Esthetic neutral and seated. Expose the restoration at each corner for one second with a Valo light (Ultradent) to gel the excess.
Final Restoration
-
- Fig. 14 – The final restoration.
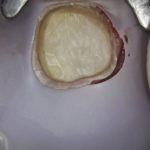
Variolink esthetic has a very nice gel set stage, making cleaning up the excess very easy. Remove excess resin with an explorer and floss. Cure the restoration for a total of 30 seconds using the Valo light on high power setting. Remove the initial retraction cord and check the restoration for any remaining cement. A final check on the occlusion is done and the patient is free to go (Fig. 14). This case presents some unique challenges because of the edentulous space immediately anterior to the restoration as well as the presence of a rotated #17. Being able to scan quickly makes it very simple to scan additional teeth anterior to the edentulous area as well as acquire more of the upper quadrant to allow the software to align the bite. This was more time consuming in the past.
In cases like this, the Plan Tab is also a very helpful feature, allowing the user to easily resize and place the library tooth in the proper orientation, which yields an initial proposal that required very little modification. Prior to the introduction of the Plan Tab being available, a restoration like this tended to take quite a bit of time to design.
The Result? Evaluating New Dental Technology
The combination of the Planmeca Emerald and Planmeca PlanCAD Easy version 5.9 helps our office complete routine cases more quickly and easily. We also are now able to routinely scan full arches, which allows us to do more and more procedures with digital impressions.
In the future, we look forward to pairing the abilities of the Planmeca Emerald scanner with 3D printing to allow us to print models and a variety of appliances in the office. Digital dentistry is no longer the future—it is the present!
Written by Michael Kelliher, DMD
Dr. Michael Kelliher is a 1993 graduate of Tufts University School of Dental Medicine. He operates a general dental practice in Longmeadow, Mass., with an emphasis on CAD/CAM restorative dentistry.
Category: Technology
Back to Articles